If you’re a mac user and edit videos on Final Cut Pro, you know that the lack of an inbuilt Adjustment Layer is really annoying. Premiere Pro has an Adjustment Layer built in, but in Final Cut Pro, you will need to put in some time and effort. I had this issue as well so I did some research and found a way.
So can you add an Adjustment Layer in Final Cut Pro? YES! You can easily add an Adjustment Layer manually.
In the rest of this article, I’m going to show you exactly how to add an Adjustment Layer in Final Cut Pro.
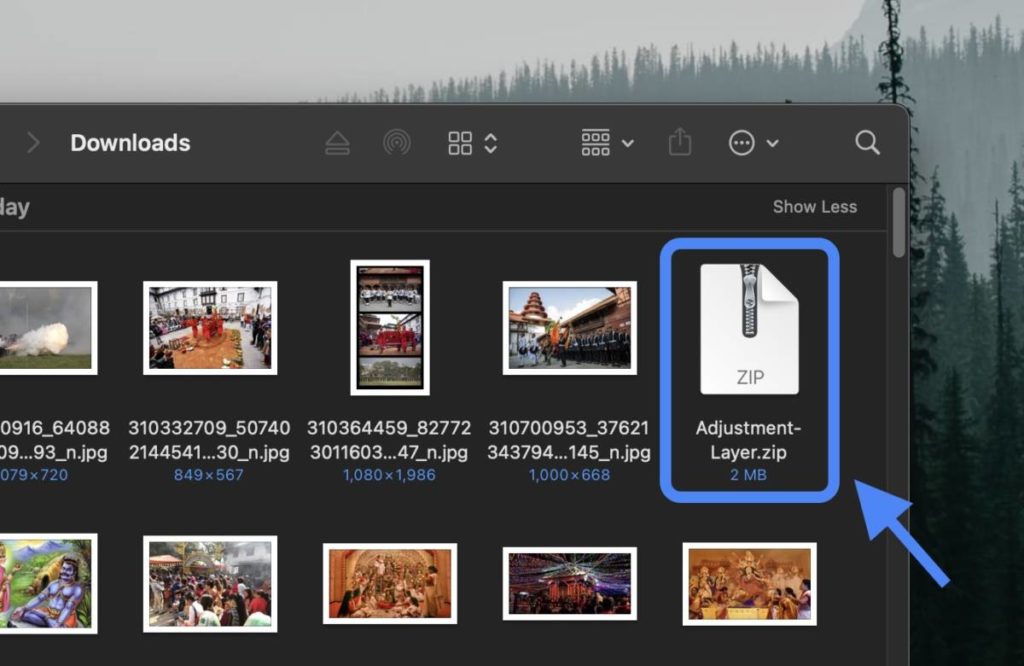
STEP 1: Download this ZIP file.
STEP 2: Double-click on the downloaded file to unzip it.
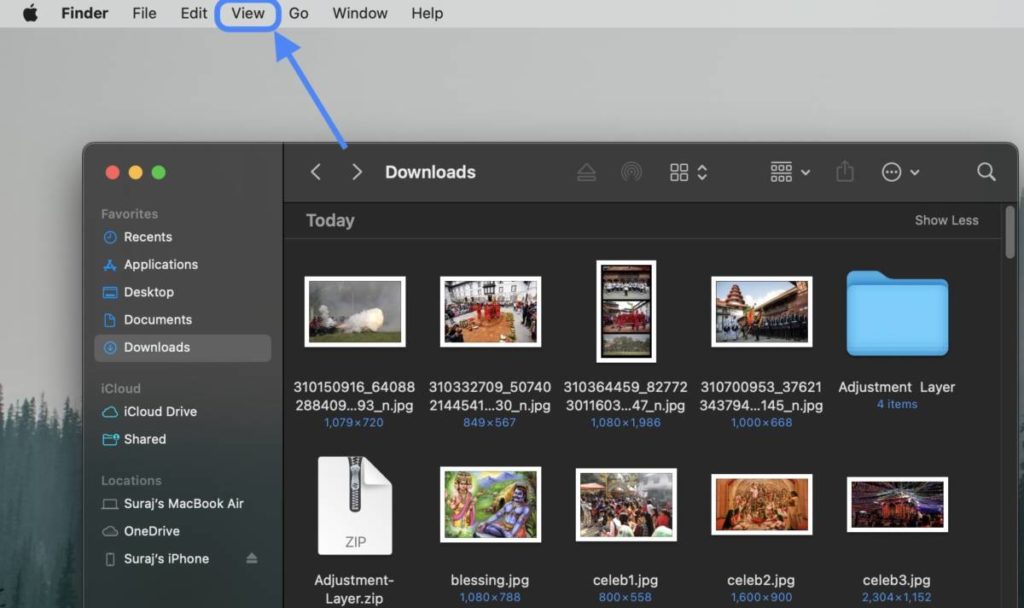
STEP 3: Click on “View” in the menu bar.
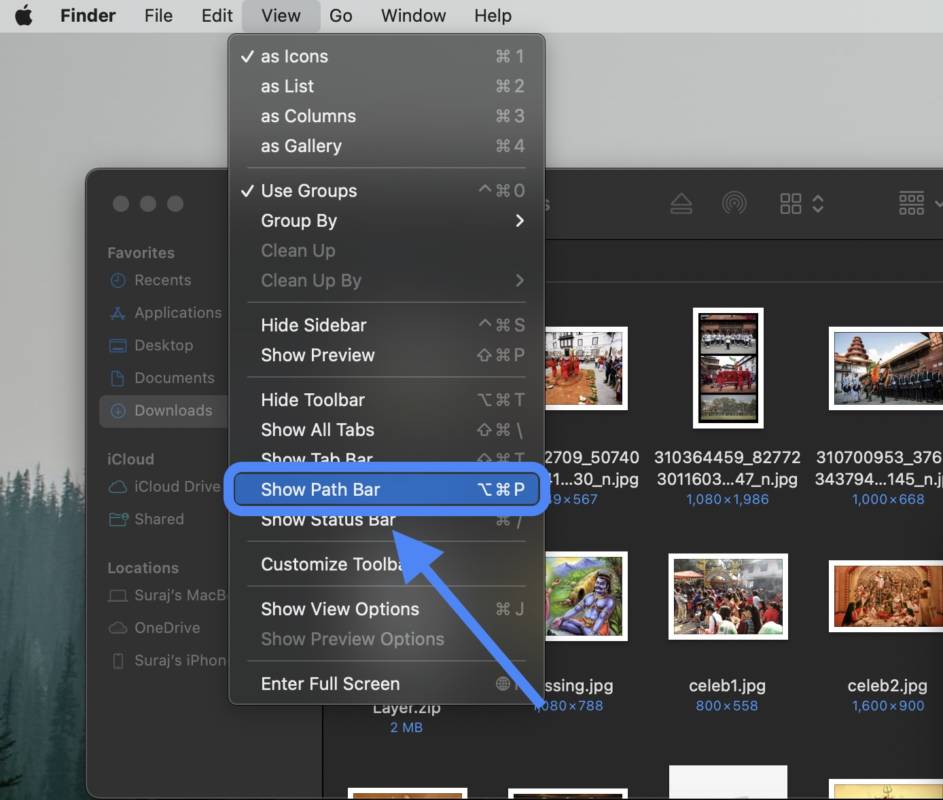
STEP 4: Click on “Show Path Bar.”
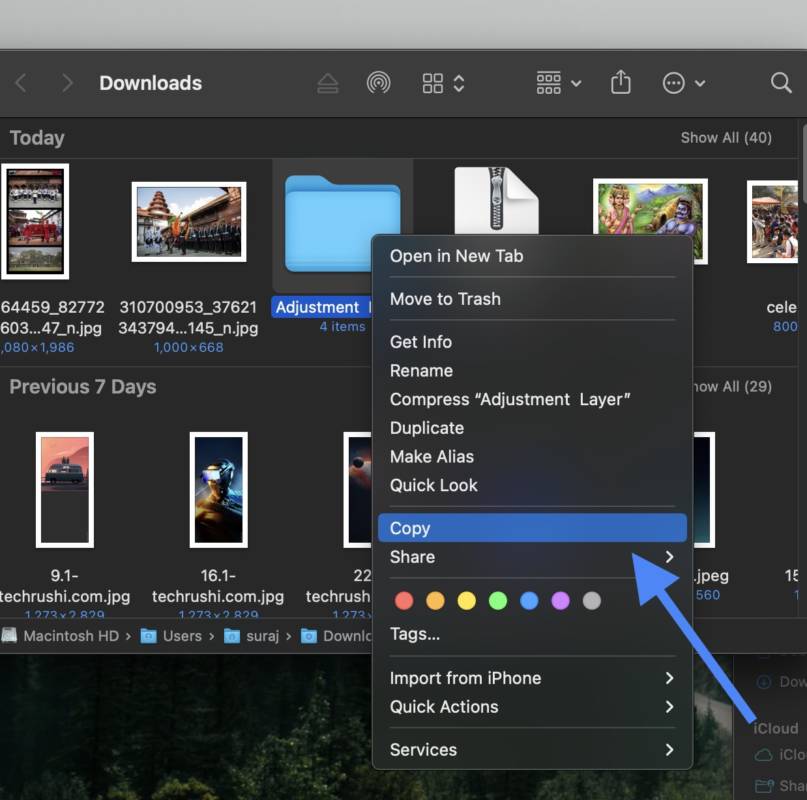
STEP 5: Right-click and copy the Adjustment Layer folder.
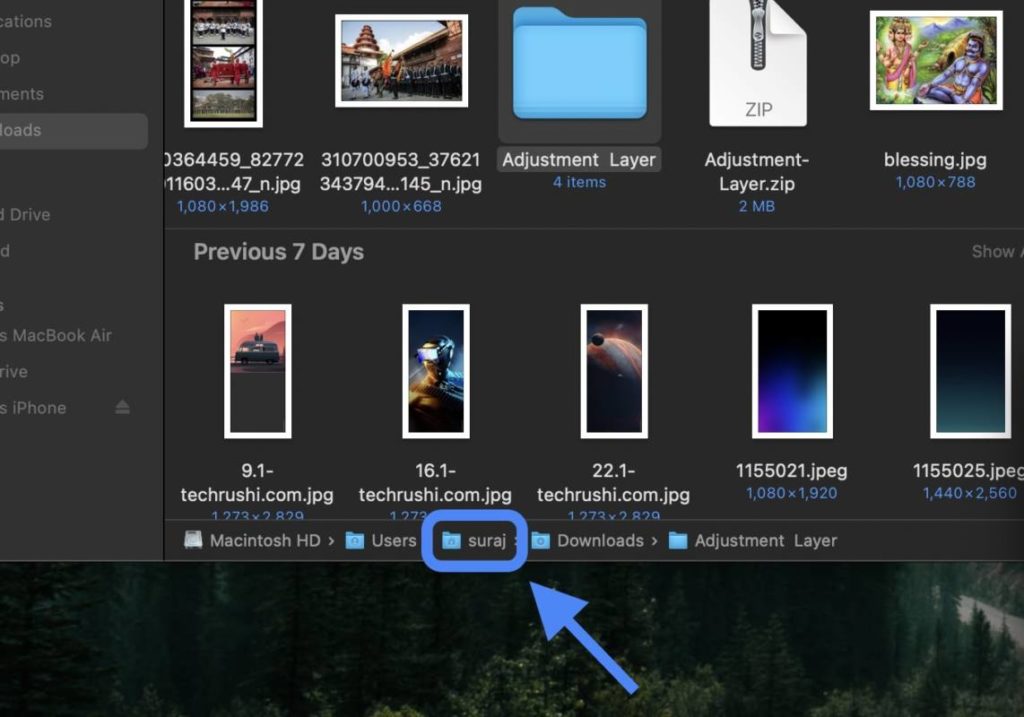
STEP 6: Click on your user name in the path bar.
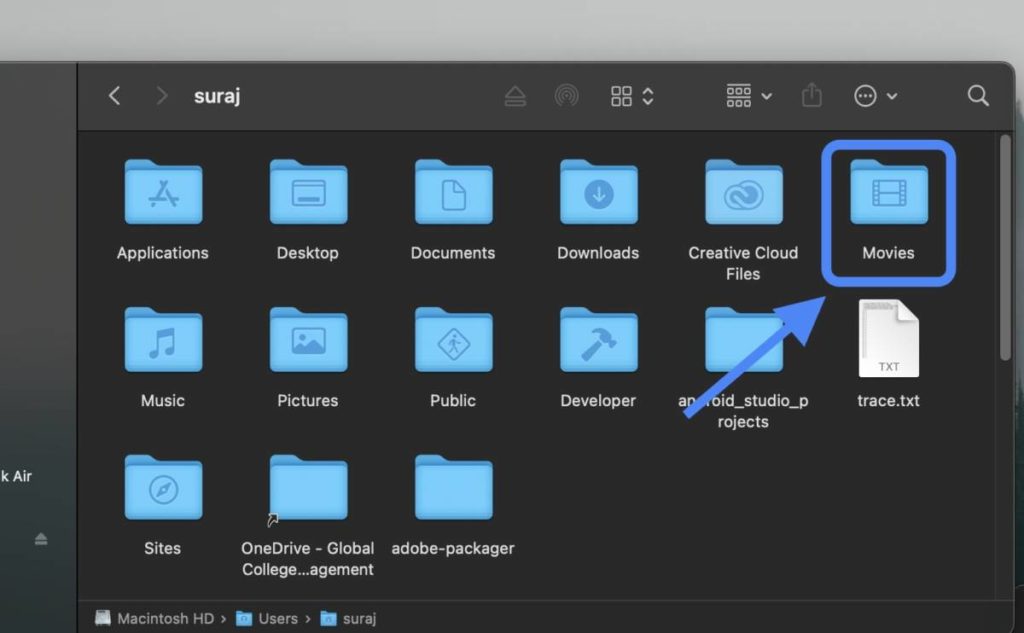
STEP 7: Open Movies.
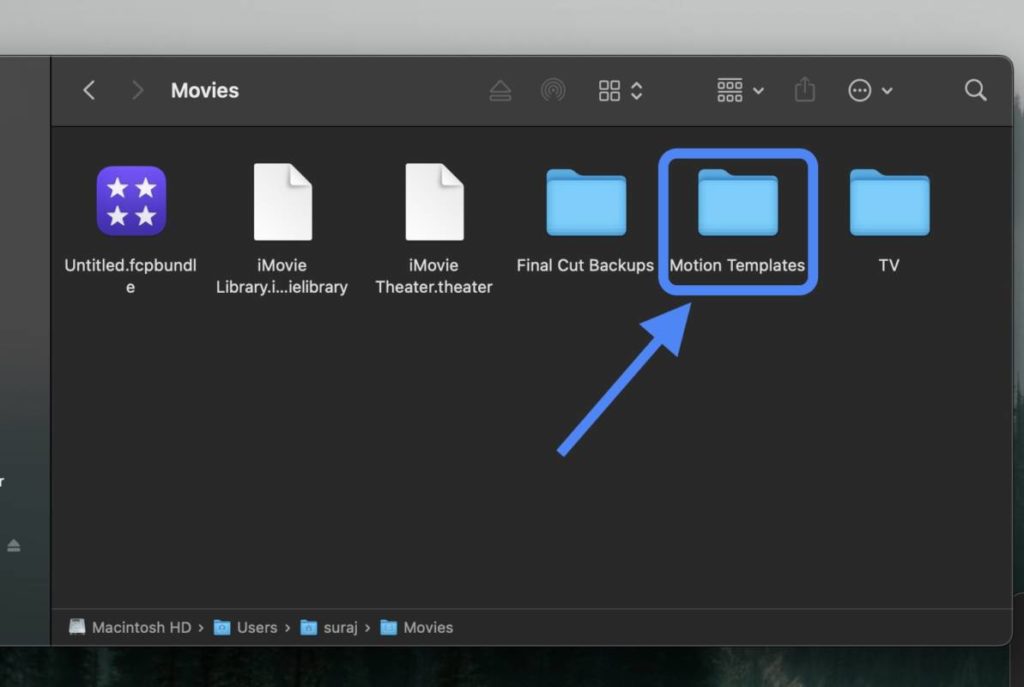
STEP 8: Open Motion Templates.
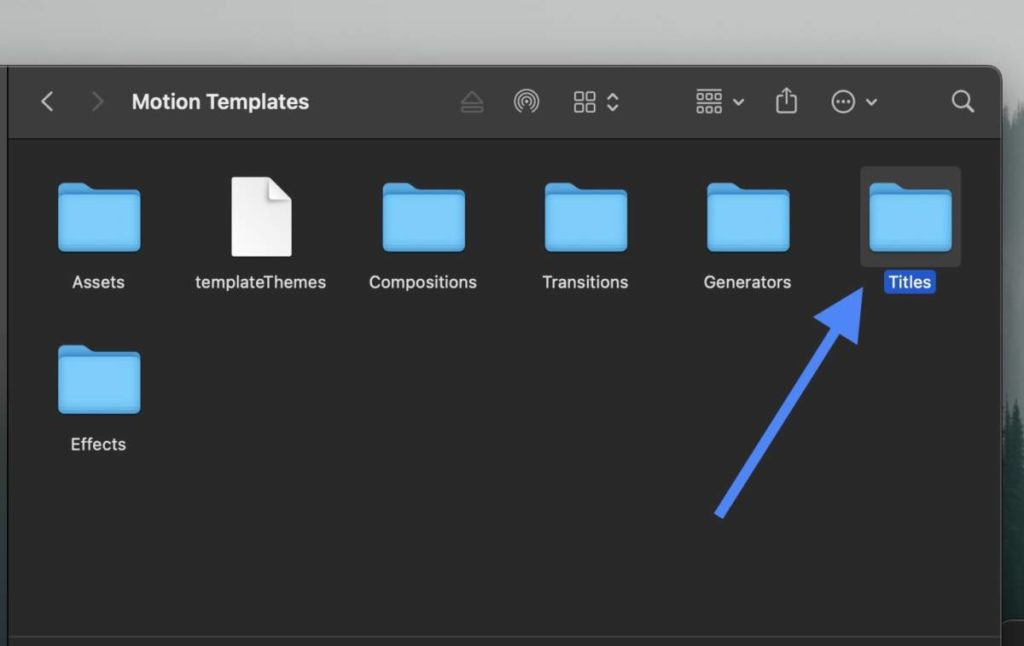
STEP 9: Open Titles.
STEP 10: Press Command+V (⌘+V) to paste it.
STEP 11: Reopen Final Cut Pro.
Step 12: Go to Titles to access the adjustment layer.
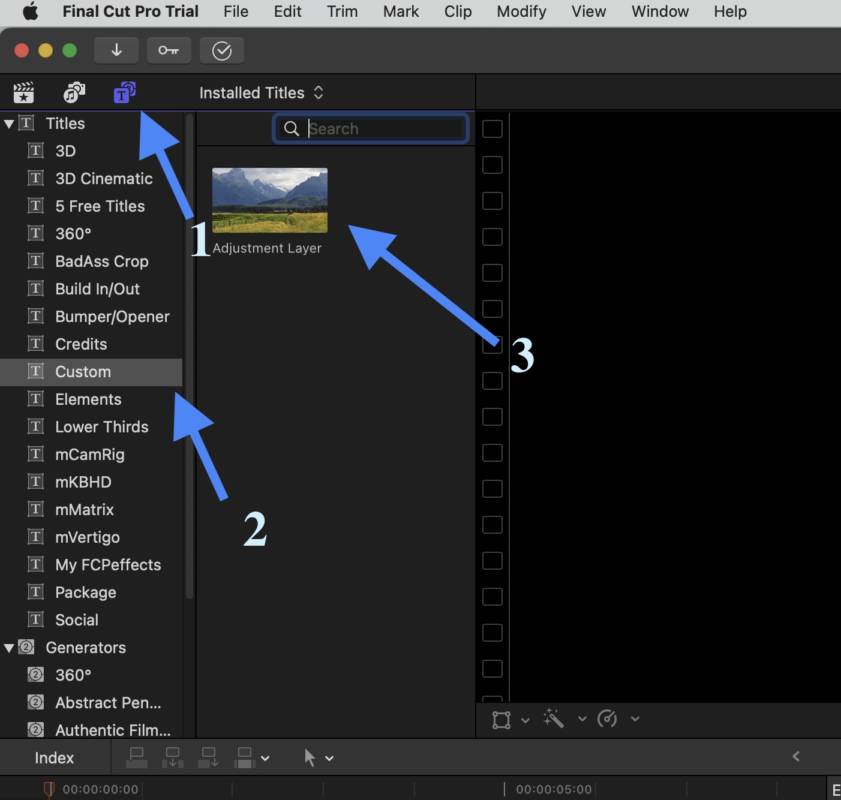
That’s it. There you have it. Enjoy!!
If you have any confusion, feel free to drop a comment down below. Until then, feel free to read these articles.
Also Read
- How To Use Adobe Lightroom, Photoshop, etc for FREE on MAC
- How To Use Final Cut Pro X for FREE Forever
- How to Get Canva Pro for FREE
- How To Use Microsoft Office Apps For FREE (even offline)
- How To Read Wall Street Journal, NY Times, etc For FREE

I really enjoy studying on this web site, it holds excellent blog posts. “Something unpredictable but in the end it’s right, I hope you have the time of your life.” by Greenday.